After years of having to deal with office supply stores idea of pink leather being a girly creative planner or the adorable but tiny Korean planners I decided to make my own this year.
I have had tons of planners over the years (I will be doing a post in the coming weeks about my favorites & why) & honestly none of them have really been everything I need & want.
I wanted something that was adorable & girly but had enough room for all my plans, to do, & everything else.

This is what I started with. (Ugly & Drab)
Exacompta Journal 21 Daily Planner
I got mine at Barnes & Noble but you can get these at several online retailers as well.
This is big enough for all of my daily notes but isn't big or bulky so it can still fit in my purse.

Inside front cover.

(I don't know why blogger keeps turning the picture sideways)
The main reason that I chose this daily planner was that it had monthly views as well.
The main reason that I chose this daily planner was that it had monthly views as well.
I don't like that the months have Saturday & Sunday combined (I will discuss this more in my everything planners post coming up) but most of the other ones didn't have them at all.

The daily pages.
I never use the time tables on the side but I couldn't find one that didn't have them.
These have plenty of room for me to jot down appointments, important notes, everything I did for the day, & my full to do list for that day.


I started out with a small angle paint brush & the colors I had decided I wanted to paint it. I found these great all purpose paints paints from Martha Stewart & they worked well on the faux leather. They were a little streaky & required about 3 coats of each but they haven't chipped, pealed off, or become stiff.
I decided that I wanted to do a stripped pattern but you could just a easily do dots or just one color. The great thing about this is that you can do it in any color or pattern that you want.
I just took a ruler & a metallic silver sharpie to draw out the lines.

First coat of lavender.

Second coat of lavender.

First coat of pink.

After 3 coats of lavender & 4 coats of pink.
My lines didn't come out as perfect as I would have liked but it's not really noticeable.

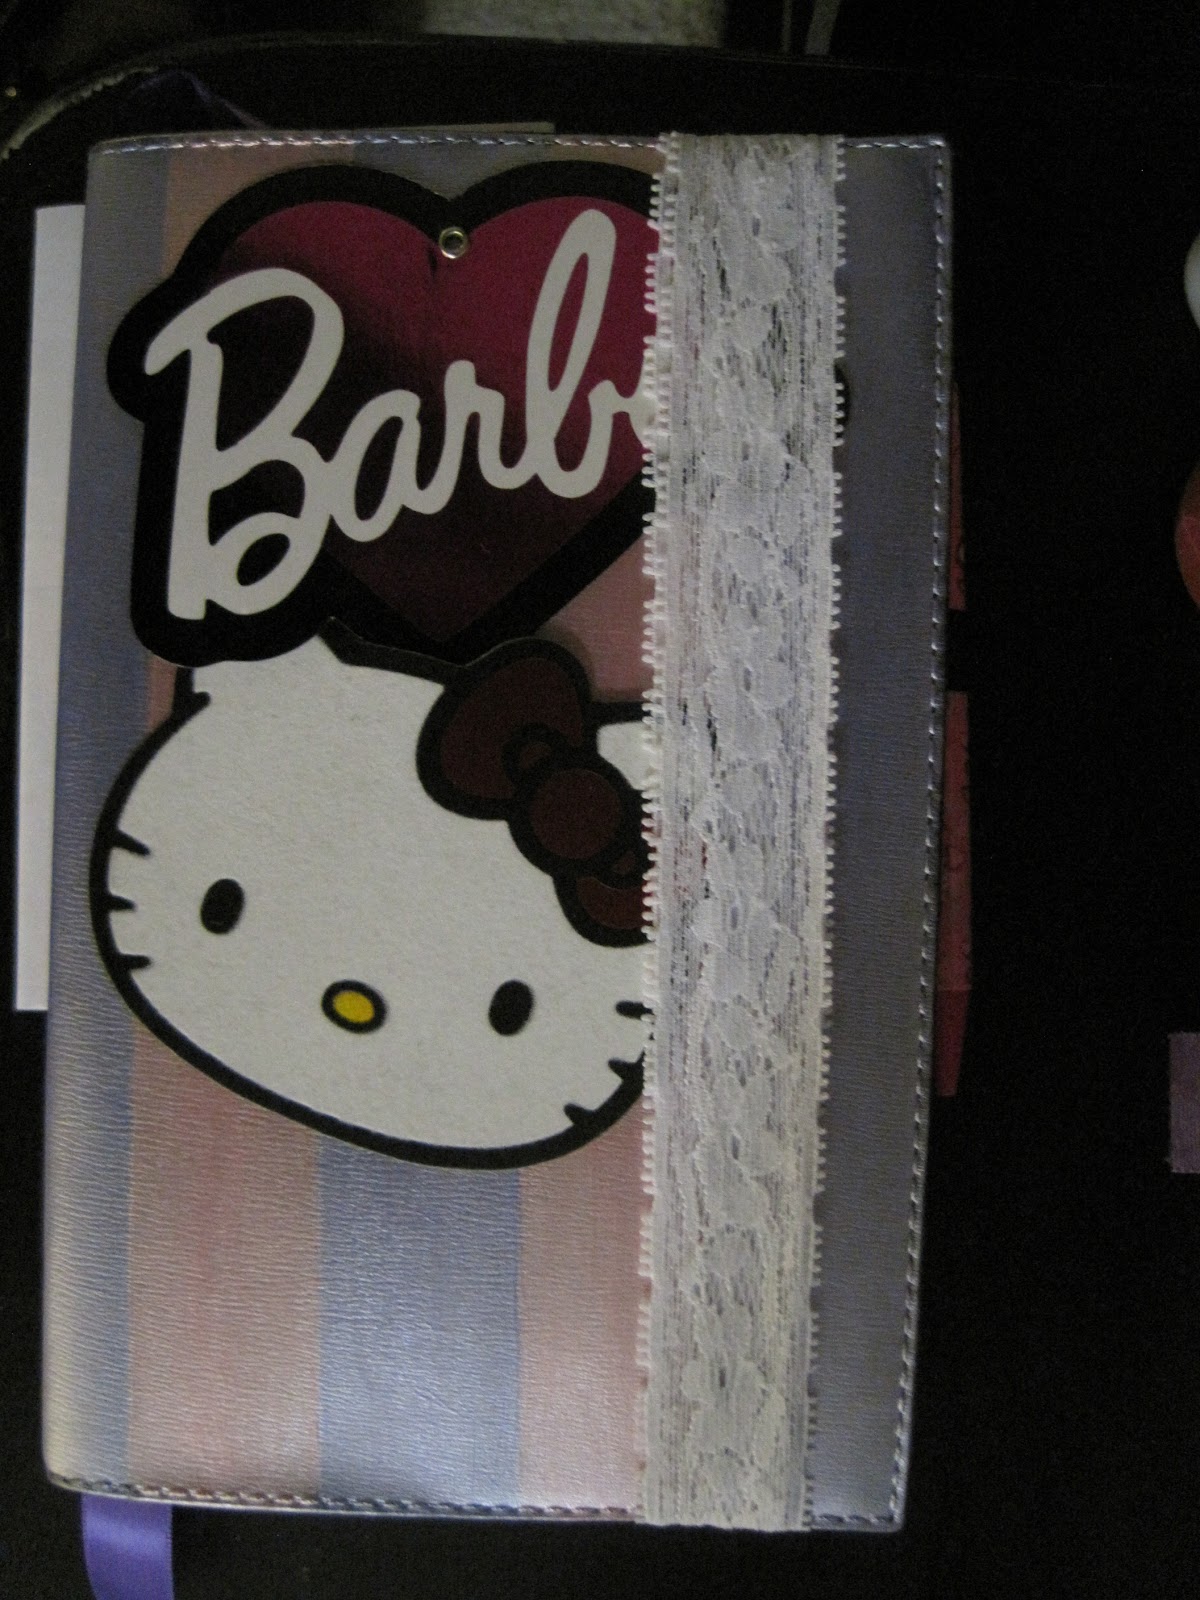
To make it more personal I took some of my Quick Grip All-Purpose Permanent Adhesive (this is the glue I used for the entire project) & added a few pictures. I chose to use some tags from a purse & wallet that I had bought. You could use any pictures or graphics that you want, just use a heavier card stock or something with a gloss finish & not plain paper so that the glue doesn't bleed through. Also make sure that you place your pieces so that you will be able to open & close it with ease if you are using a thicker paper.
I also plan on adding some stud detail & a few deco pieces but I haven't found just the right ones yet.

Next I took some elastic lace, wrapped it around & glued it down around the back.
This will keep the book closed while it is in my bag.
I also added a ribbon (I glued it to the spine of the book) as a place marker. This planner has pull off corner tabs to keep your place but I find a ribbon much easier to used.
I will be using a magnetic bookmark as a place marker for the monthly pages.

I took some pieces of deco pattern paper (from deco sticker pack I had got off ebay) & wrote my goals for the year on them in silver sharpie. Then I stick them on the inside of the front cover. This way I see them every time I open up my planner, plus it makes it look a lot cuter.


I used various stickers & a few from the deco pack to decorate the monthly pages. I decorated the tops of the pages coincide with the theme of the month. I also added a few stickers to days that I know I will be having special events or a holiday, as time goes on I will add more of these as events come up. This is one of the reasons that I'm disappointed that the weekends are grouped together (most of my special events are on the weekends).


I also added a few themed decorative stickers to certain days.
I will probably add random stickers to most days as they pass.

This is kind of how I have been laying out my days so far. I'm sure this will change many times as my need change through out the year.

I added a Moleskin skinny notebook (I scribbled a stripe pattern in metallic markers on it) to the back for random notes & a stick on pen holder from Staples.
The finished product! Cute & Fab!
I have been using it for a couple of days now & I am so happy with how this came out.
It has room for everything that I need & looks adorable.
This is soooo cute!!!! Thank you
ReplyDelete