Showing posts with label how to. Show all posts

Monday, September 3, 2012

Getting Ready for Halloween 1- Decisions, Research, and Planning


OK, so this is the beginning of my Halloween posts. I'm not entirely sure how these will go or where they will end up, but you'll be along for the ride as I get ready for Halloween.
One of the main reasons I wanted to do these posts was to show the amount of trial & error that goes into our Halloween costumes. Very rarely is it a smooth ride & almost always, we are scraping by at the end. It's a lot of work but, I would never stop doing it.

Friday, March 30, 2012

March 2012 Complimentary Quickie Makeup Look

I have really been loving my Wet N Wild Walking on Eggshells & Sweet as Candy trios this month. I know that I have been doing a ton of looks with the Wet N Wild trios lately but, they are just so convenient & really great quality. I have also been getting back into pin-up style looks lately. They can be tweeked to go with anything. They're simple, quick, & easy to do. Plus, they just look great with my current spring style & keep my face looking sultry but still springtime fresh.

Products Used:
Too Faced Shadow Insurance
Essence Stay All Day in Glammy Goes To... (or Stars & Stories)
Too Faced Blending Brush
Wet N Wild trio in Walking On Eggshells (or Sweet As Candy)
ELF Shadow Brush
Physicians Formula 2in1 Eye Booster Liner in Ultra Black
Wet N Wild MegaShimmer in White Lotus
Maybelline The Falsies Black Drama Mascara
Gotta B' Urban Powder Brush
Ulta Cheek Color in Heartbreaker (or any pink toned blush)
Maybelline lipstick in Peachy Scene (or any pink toned lipstick)

Hope you all enjoyed!

Friday, March 9, 2012

Turning a T-shirt and Jeans Into An Outfit- Plus NOTD

I am so sorry that this took me so long to get up but, got overwhelmed by other blogs that I had to get up for the end of the month & I had a family issue that I had to help with!
Anyway, on to the post.
Most of the time, I don't really want to think about what I'm going to be wearing. I just want to get dressed & get on with my day. (of course this doesn't apply to when I'm going to the club, that's my super fun fantasy dress up time!) However, I don't want to look like a slob or like I have no style simply because I'm only running errands.
After years of being a t-shirt & jeans girl, I have found the perfect formula for making it look like a pulled together stylish outfit. 
*This mostly applies to the fall & spring months where it's chilly but not cold.*

My bird dish! I keep a necklace (not pictured), 2 rings, a bracelet, & a simple pair of studs in here. These items go with everything & it keeps me from digging through my jewelry box trying to find something to go with my outfit. I can just grab & go.

Thursday, March 1, 2012

February 2012 Complimentary Quickie Makeup Look

To be quite honest, I was not really happy with how this tutorial came out. I have done this look fairly often in the past several months & never had trouble with it like I did while filming this. Normally the taupe color is much more dominate & the dark shade goes on much easier.
With that being said, I still think that it looks nice.
You can easily control how dark or smokey this is by adding more or less of the darker shade. This makes the look adaptable for work or just everyday life.

Products Used:
Urban Decay Primer Potion
Maybelline Expert Wear Brow Pencil in Blonde
Milani Brow Fix Brow Kit in 01 Light- highlight
Ulta Eyeliner in Plum
Sephora Smudge Brush
Wet N Wild Trio in Silent Treatment
Studio Tools Crease Brush
Revlon Double Twist Mascara
Sephora Retractable Waterproof Lipliner in Raspberry
Sephora Cream Lip Stain in 06
Gotta B' Urban Powder Brush
Physicians Formula Happy Blush in Pink

Tuesday, February 21, 2012

Boho Chic Rocker Look

I know that this is a little late for the Fall/Winter season but, I have really been loving this look for the past couple of weeks. It looks so great with a warm sweater or big scarf & leather jacket, which seems to be all I have been wearing lately.
Hope you enjoy!

Products Used:
Urban Decay Primer Potion in Greed
Studio Basics Double Ended Brush (I'm not sure if this is available anymore)
Revlon Satin Eyeshadow in Polished Bronze
Wet N Wild ColorIcon Eyeliner in Black
Revlon Satin Eyeshadow in Platinum Glimmer
Generic Flat Shader Brush (from e-bay brush set)
Loreal Infallible Eyeshadow in Midnight Blue
Revlon Perle Eyeshadow in Sunlit Sparkle
Urban Decay 24/7 Glide-On Eye Pencil in Corrupt
Too Faced Lash Injection Mascara
Real Techniques Kabuki Brush
Tarte Park Ave Princess Bronzer
Gotta B' Urban Blush Brush
Ulta Cheek Color in Infatuation
Tarte LipSugence in Moody
Maybelline Lipstick in Madison Mauve

Monday, February 13, 2012

Valentine's Day Looks- Glowing for Him & Sultry for You

This year I decided to do 2 looks for Valentine's Day. The glowing, perfect version of you that guys love & the sexy, sultry look you love to wear. I hope that you'll give them both a try!
The angle on the Sultry look is a little weird & I didn't notice until I was editing. So, sorry about that. Hopefully it's not too hard to see what I'm doing. I will make sure to watch out for that in the future.

GLOWING FOR HIM
Products Used:
Milani Brow Fix Kit in Light Highlighter Shade
Too Faced Shadow Insurance
Studio Tools Crease Brush
Naked from Urban Decay Naked Palette
Ulta Eyeshadow in Twilight
Urban Decay Shadow Brush
Sin from Urban Decay Naked Palette
Virgin from Urban Decay Naked Palette
Sephora Eye Crayon in 505
CoverGirl Liquiline Blast in grey
Creep from Urban Decay Naked Palette
Gunmetal from Urban Decay Naked Palette
Maybelline One By One Mascara
Gotta B' Urban Powder Brush
Ulta Cheek Color in Afterglow
Generic Powder Brush
Tarte Park Ave Princess Bronzer (this is just what I had laying around, 
use any slightly shimmery bronzer)
Physicians Formula Mineral Glow Pearls in Translucent Pearl
ELF Studio Blush Brush
Physicians Formula Shimmer Strips in Miami Strip
CoverGirl LipPerfection in Siren

This is the simple, chic model type look that I was talking about


SULTRY FOR YOU
Products Used:
Urban Decay Primer Potion in Greed

Studio Tools Crease Brush
Naked from Urban Decay Naked Palette
Hustle from Urban Decay Naked Palette
Virgin  from Urban Decay Naked Palette
CoverGirl Liquiline Blast in black
Renewal Smudger Brush
Urban Decay Shadow Brush
SideCar from Urban Decay Naked Palette
Toasted from Urban Decay Naked Palette
GunMetal from Urban Decay Naked Palette
Creep from Urban Decay Naked Palette
Revlon Double Twist Mascara
ELF Studio Stippling Brush
ELF Studio Blush in Fuchsia Fusion

ELF Studio Blush Brush
Physicians Formula Shimmer Strips in Miami Strip
Sephora Retractable Lipliner in Raspberry
Jordana Lipliner in Cranberry Cocktail
Maybelline Super Stay 10hr Stain/Gloss in Fresh Fuchsia #110
(I would also suggest CoverGirl LipPerfection in Eternal)


I hope that you enjoyed both of these Valentine's looks.
I can't wait for March so I can film my smokey green look that I have planned for you.
Have a great Valentine's Day!

Wednesday, February 8, 2012

Spoiled Brat Quick Club Look

This is my go to club look that I was talking about in my 2011 Favorites.
I love this look so much. It's really quick & simple but, always looks so stunning.


Products Used:
Urban Decay Primer Potion in Eden
Too Faced Blending Brush
Wet N Wild ColorIcon Spoiled Brat Trio
Generic Shader Brush
Makeup Forever Aqua Eyes Liner in 0L (black)
Maybelline The Falsies Black Drama Mascara
ELF Studio Blush in Fuchsia Fusion
Revlon ColorStay Mineral Finishing Powder in Brighten
Sephora Retractable Lipliner in Raspberry
Maybelline lipstick in Fifth Ave. Fuchsia
Loreal HIP Shine Struck Liquid Lipcolor in Arresting

Let me know if you liked me doing the fast forward of the rest of the face.

Friday, February 3, 2012

January 2012 Complimentary Quickie Makeup Look

So here is my first of the new monthly series Complimentary Quickies!
These are designed to be easy, fast looks that go with pretty much anything. It doesn't matter if you're wearing jeans & a t-shirt to run errands or running a little late for work & need to look nice fast.
Most of these looks will be done with palettes. This is just for ease of use & shorter time. It's much simpler to grab one little palette, then dig through your drawer looking for a certain color.
I will also be using more sheer lipsticks to save time on lining your lips.


Products Used:
NYC Smooth Skin Bronzing Face Powder in Sunny
Sleek Dual Ended Brush
Real Techniques Kabuki Brush
Physicians Formula Mineral Glow Pearls in Translucent Pearl
Maybelline Expert Wear Brow Pencil in Blonde
High Definition Double Ended Brush
Ulta Professional Eye Primer
Almay Intense I-color in Trio For Blues
CoverGirl LiquilineBlast in Grey
Studio Tools Blending Brush
Rimmel Soft Kohl in Jet Black
Too Faced Lash Injection
Maybelline Blush in Pressworthy Pink
Gotta B' Urban Powder Brush
Revlon ColorBurst Lipstick in Carnation
I also really love-
CoverGirl LipPerfection Lipstick in Siren
Revlon Lip Butter in Strawberry Shortcake or Sweet Tart

Here's a picture of the new Almay trio packaging (obviously in a different color)

Let me know what you think about these looks & if you have any suggestions.

Wednesday, January 25, 2012

Kat Von D Mi Vida Loca Palette Look

When I saw this babe pop up on the Sephora facebook page last week I instantly knew that I had to have it as soon as possible! (When I went to my Sephora it wasn't even on the floor yet, I had to make the girl dig through boxes in the back to get it for me!) Of course this also meant that I had to use every single color in it at the next available opportunity! Then in came the perfect opportunity, my friend Anthony's 80's/Disco birthday party! I don't think that 2 things could have gone together better. I ended up using every color except for the green & loved how it came out so much I decided to recreate it in a tutorial. This is very similar to the tutorials I did for the Urban Decay palettes but, I did leave out one of the colors & ended up using a few other items. I was more concentrated on making the best of my palette rather then trying to exclusively use just this for the whole look.

Look How Pretty!

One thing that I did notice with this palette is that it isn't quite as buttery & pigmented as her other palettes that I have. However, this is the first one that I have bought since the re-design so I don't really know if that's how all of them are now. It is still an excellent palette & a great value for those of us that love all the crazy, extreme, bright colors & want more then just mattes.
This was the first time I have tried the Kat Von D eyeliner & I feel that it is very similar to the Urban Decay liners. It smudges & blends well but isn't really suited for the waterline. I just had a lot of trouble getting it to go on & it was gone in a matter of minutes. I still like it for smudging on the top lash line or under the bottom lashes though.


Products Used:
Urban Decay Primer Potion in Greed
ELF Gem Blending Eye Brush
Calypso & Money Honey from Sleek Primer Palette
Rite Aid Renewal Eyeshadow Brush
ELF Gem Eyeshadow Brush
Essence Sparkling Effect Eyeshadow in Black Goddess
Urban Decay Glide-On Eye Pencil in Binge
Victoria's Secret Beauty Rush Liquid Glitter Liner in Liquid Metal
ELF Liquid Eyeliner in Stardust
Kleancolor Double Agent Mascara
Maybelline The Falsies Black Drama Mascara
Forever 21 Love & Beauty Blush Brush
La Femme Blush On Rouge in Mulberry & Fuschia
ELF Studio Kabuki Brush
ELF Studio Blush Brush
Revlon Colorstay Mineral Finishing Powder in Brighten
Prestige Lipliner in Love
Wet N Wild Mega Last (matte) Lipstick in Dollhouse Pink #967
Sleek True Color Lipstick in Pink Freeze
Revlon Colorburst Lipgloss in Hot Pink
Jordana Lip Out Loud Lipgloss in ASAP #106

Friday, January 20, 2012

Tips for Eating Healthier Without Really Trying

I know that it is a great many peoples goal each New Year to eat healthier or lose weight. Sometimes this can feel like a horribly daunting task but, I'm here to share a few super easy tips to make it simply flow into your regular life with little to no hassle. This is not about cutting out everything you love but rather about making healthier choices easier & seeing what you eat.

Tuesday, January 10, 2012

Scenting Your Home For Success!

I know that the name is kind of cheesy but I couldn't really think of another name for this post.
I'm basically going to be talking about how you can use different candles to create productivity zones in your home. It sounds kind of silly but, I swear that it works wonders!
Of course, you don't have to use candles. Any scent item will work. Wax warmers, wall plug-ins, oil burners, even those little scent pods or a room/linen spray. I particularly use candles so, that's what I will be discussing.

I sort of stumbled across doing this in early 2011 when I started to really get back into candles. I have always kind of liked the way that they look around the house as a decorative accent. Of course they make your house smell good too but, you can really use different scents around your house to create different moods. 


A scent is one of the easiest ways to trigger a specific memory. Like how the smell of a roast turkey will instantly make you think of Thanksgiving dinner or  your grandmothers cookie recipe will make you think of her (just examples of course). So why not train your brain to associate a specific scent with a certain task?

Wednesday, January 4, 2012

Drab to Fab- DIY Day Planner

After years of having to deal with office supply stores idea of pink leather being a girly creative planner or the adorable but tiny Korean planners I decided to make my own this year.
I have had tons of planners over the years (I will be doing a post in the coming weeks about my favorites & why) & honestly none of them have really been everything I need & want.
I wanted something that was adorable & girly but had enough room for all my plans, to do, & everything else.

This is what I started with. (Ugly & Drab)
Exacompta Journal 21 Daily Planner

Friday, December 23, 2011

Double Feature- Work/Family to Party Makeup & Style

I know that it is very easy to get double or even triple booked for events this time of year. 
I wanted to do a look that was in the holiday spirit & glamorous but toned down for work or family events. I also wanted it to be easy to transition this look into something for going to hang out with friends without having to go home & completely change everything. I wanted to be able to do a quick transition with minimal stuff that could be done in a car or small bathroom.


Wednesday, November 9, 2011

Fall Metallics

I have been seeing tons of these neutral metallic's lately & thought that they would be perfect for a simple, glammed up, everyday fall look. The neutral, one toned color palette really grounds this look. While the metallic nature of the colors makes it look a little more classy & glamorous.


Products Used:
Too Faced Shadow Insurance
CoverGirl LiquilineBlast (purple)
High Definition Duo Brush (blending & pencil)
Revlon Satin Eyeshadow in Polished Bronze
Real Techniques Base Shadow Brush
Revlon Perle Eyeshadow in Sunlit Sparkle
Rimmel Eyeshadow in Backstage
Rimmel Eyeshadow in Spicy Bronze
Studio Basics Eyeliner Brush
Physicians Formula Shimmer Strips Gel Cream Liner in Glam Green Eyes
Maybelline One By One Mascara
ELF Blush Brush
ELF Blush in Tickled Pink
Prestige Lipliner in Love
Maybelline Lipstick in Madison Mauve

Tuesday, October 25, 2011

Well, Aren't You A Sexy Devil


Thanks so much for the request Megan!
I'm so glad that I got to do this look! It turned out so beautiful, I hated that I had business stuff to take care of & had to wash it off afterwards.
Of course you can change the colors up to use this for other costumes as well (maybe black & gold for a tiger or cheetah outfit)


Products Used:
Urban Decay Primer Potion
Studio Tools Crease Brush
ELF 100 Palette #11
Ms. Makeup Eye Shading Brush
Essence Eyeshadow in It's Up To You
Sleek Dare Devil from Primer Palette
Rimmel Exxagerate Eye Definer in Noir
Ms. Makeup Angled Eyeliner Brush
Loreal Eyeshadow in Raven
Maybelline The Falsies Black Drama Mascara
LA Splash Glitter Splash in Starlight Red
Sally Girl Loose Glitter in Gold Digger
Hard Candy Show Girl's Secret Glitter Glue
Generic stiff flat shader brush
Simply Simmons Fan Blender (this is from the craft store &
is the best brush I have ever found for dusting away fall out)
Love & Beauty Blush Brush
NYC Cheek Glow in Cherry Blossom
Revlon Mineral Finishing Powder in Brighten
Sephora Retractable Lipliner in Raspberry
Revlon Super Lustrous Lipstick in Matte Really Red
Kleancolor Plump & Shine Lipgloss in Sandstone

BloodRayne look


This look was requested by Sherry Von Rosen.

I really like the end result & love how beautiful it made my eyes. It naturally made them look icy pale green, just like hers.


Products Used:
Urban Decay Primer Potion Original
Rimmel Exaggerate Eye Definer in Noir
Sephora Smudge Brush
Studio Tools Medium Shadow Brush
Physicians Formula Matte Collection Quad in Quartz (bottom left)
Studio Tools Blending Brush
CQ Eyeshadow in Champagne
ELF 100 Palette #78
Physicians Formula Matte Collection Quad in Quartz (bottom right)
ELF 100 Palette #90 (to mix with dark brown & smoke out top lash line)
Great Lash Mascara in Dark Brown
High Definition Angled Blush Brush
Sleek Face Contour Kit in Light
CoverGirl Cheekers blush in Pretty Peach
Ulta Cheek Color in Infatuation
Color Institute Lip Liner Pencil (no color on package)
High Definition Concealer Brush
Studio Tools Concealer Brush
Ulta Lipstick in 214
ELF 100 Palette #55


Thanks for the request! :)

Monday, October 17, 2011

60's Playboy Club Bunny

This look is simple & classy but has a sexy edge to it with the graphic liner. You can completely customize this look to fit your outfit with the color you use on your lid & lipstick.


Products Used:
Urban Decay Eyeshadow Primer Potion in Greed
Real Techniques Base Shadow Brush
Revlon ColorStay eyeshadow quad in In The Buff
Rimmel Exaggerate Waterproof Eye Definer in Noir
Sephora Smudge Brush
HIP Crystal Shadow Duo in Precious
Sephora Eyes Pencil in 505
Ms. Makeup Angled Eyeshadow Brush
Kat Von D Eyeshadow in Lucifer from Metal Orchestra Palette (any richly pigmented black shadow will due)
Maybelline The Falsies Black Drama Mascara
Gotta B' Urban Powder Brush
Ulta Cheek Color in Afterglow
Sephora Nano Lip pencil in Pinup Pink
CoverGirl Lipstick in Eternal
Revlon ColorBurst lipgloss in Hot Pink

Thank you for the request!
I look forward to seeing everybody's Halloween costume.

Thursday, October 13, 2011

Pin-Up Pink Breast Cancer Awareness Look


Breast cancer is a very real threat for woman today & effects a great many people's lives.
This feminine & classic look is perfect for dinners or events you may have coming up. It is simple enough that you can even just wear it to show your support everyday!


Products Used:
Rimmel Exaggerate Eye Definer in Noir
Sephora Smudge Brush
Too Faced Shadow Insurance
Studio Basics Retractable Eye Shading & Detailer Brush
Ulta Eyeshadow in Twilight
Milani Brow Fix Kit in Light- highlight
ELF Eye Transformer- pink shade
Too Faced Shadow Insurance Glitter Glue
Revlon Diamond Lust eyeshadow in Starry Pink
Sephora Eyes Pencil in 505
Physicians Formula Eye Booster Eyeliner in Ultra Black
Loreal Double Extend Mascara in Blackest Black
Gotta B' Urban Powder Brush
Maybelline Blush in Pressworthy Pink
Sephora Nano Lipliner in Pinup Pink
Maybelline lipstick in Fifth Ave. Fuchsia

I hope that you girls enjoyed this look & 
take just a little bit of your time to support someone effected by breast cancer this month.

Thursday, October 6, 2011

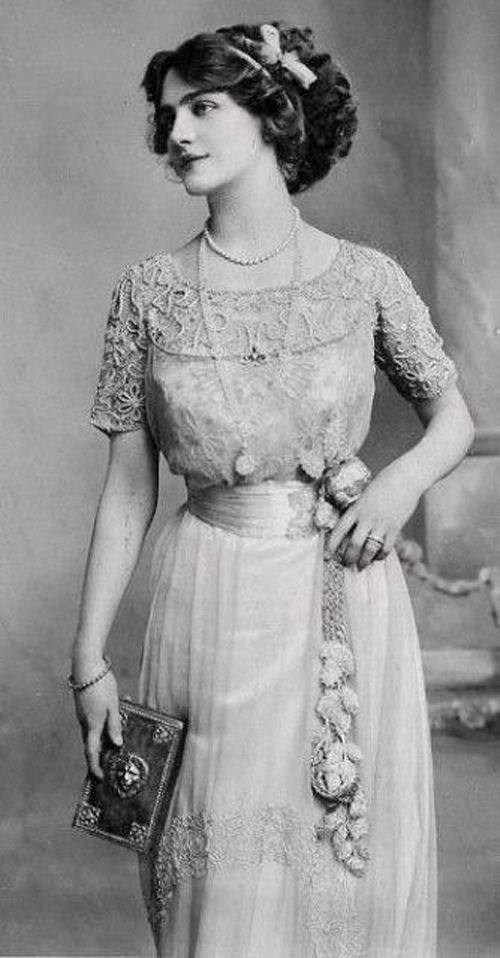
Edwardian Society Lady


I love doing historical looks like this. You can tone up the theatricals & stylizing of this look by doing slightly deeper colors with slightly more pronounced highlights.
Finish off this look with a beautiful rose scented perfume to keep with the era.

Titanic & My Fair Lady are great movies to watch for more stylized ideas.


Products Used:
Foundation- Revlon Colorstay or Makeup Forever Mat Velvet +
Mixing Founation (to make your foundation easier to blend)- Maybelline Dream Liquid Mousse (Porcelain Ivory adds a great pink tone & creamy texture for fair to light medium skin) or Makeup Forever HD Foundation (adds a nice luminosity)
Palladio Rice Powder in Translucent
Real Techniques Blush Brush
Maybelline Expert Wear brow pencil in Blonde
Milani Bow Fix Kit in Light
High Definition Dual Brush
Ulta Professional Eye Primer
Studio Tools Medium Shadow Brush
ELF 100 Palette #41
ELF Professional Eye Shadow Brush
ELF 100 Palette #40 & #28
Studio Tools Crease Brush
ELF 100 Palette #29
ELF 100 Palette #59
ELF 100 Palette #51
ELF 100 Palette #89
ELF Small Angled Brush
Physicians Formula Eyebrightener in Natural Eyelight
Too Faced Lash Injection
Generic Lash Spoolie
NYC Cheek Glow in Cherry Blossom
Gotta B' Urban Powder Brush
Physicians Formula Mineral Glow Pearls in Translucent Pearl
Lipsticks- Revlon Just Bitten in Crave, Maybelline Colorsensational in Bitten Berry, CoverGirl Lip Perfection in Eternal,, or Revlon Matte in Really Red (I don't suggest this one, even though it's the one that I used, I always forget that this color comes out much more orange then it looks in the tube)
Generic Lip Brush


If you find that blending in the lipcolor gave you a smudgy lip line, run a brush with a bit of concealer around the edge of your lip. This will give you a nice crisp edge.

Thursday, September 29, 2011

The Perfect Winged Eyeliner ? ? ? A Youtube Lie & How To Make It Actually Work For You

There are tons of videos like this out there & it's always so frustrating to me. It's not that they do a bad job. The girls always do a wonderful job & their liner looks great.
The problem is that it looks great on them.
Everyone's eye's are different & this often gives girls the wrong impression. The'll do it exactly like the girl does in the videos & then it won't look like it did on the girl that did the video. Because of this they think that they just can't wear winged liner or that it just looks bad on them.
This, of course, is not true. You simply have to work with your eye shape & may need to do it in a different shape to achieve the style & shape you're looking for.
So it's not that I'm against these videos, it's just that I think that they need to be renamed to something like  "How I do my winged liner".

So how do you know how to do winged liner on your eye shape?
Practice & lots of it!
I suggest sitting in one night, taking a cheap black eyeshadow with an angled brush (my favorites are Raven eyeshadow by Loreal & the ELF Angled brush, I find that a small angled brush is easier to control then a bent or pointed liner brush when you are first starting out), some baby wipes & going to town. Try it out & wipe it off until you find something that works for you. Then, when you get it to a point that you like it, take a picture (with eyes open & closed) & post it in the area that you do your makeup. This way, you have your very own little cheat sheet next time you go to do your liner.

 So, where do you start?

There are a few different techniques to figure out the general line that you can follow. Each will give you a different shape & pronounce your eyes slightly different. Most of it comes down to personal style & what comes more naturally to you.
#1- Put on a pair of false lashes that have a long curved outer corner. Open your eyes wide & follow along the outer edge of the lashes. This technique is best suited for people without a deep set crease or that naturally have a large lid space. This gives you a traditional 50's-60's type of look.
#2- Extend the line from the natural curve of your lower waterline. Place your brush on the corner of your water line & just follow where that would naturally go if it extended towards your brow. I find that this technique works on all lid shapes & will give a upturned look to the eye.
#3- Place a cream product along your lower lash line. Then take the side of your index finger, place it along your lower lash line & drag your finger along the lash line to either your temple or the corner of your brow. Now just follow your liner along the inside of the smudge. I find that this technique works the easiest for those just learning where they should place their liners outer edge.
#4- If you like more of a triangle elongated effect, take the line from the middle of your bottom lash line up towards your brow or temple. This technique is much harder to master & really is dependent on eye shape as well as personal preference.
#5- Take a piece of paper, line it up from the corner of your nostril to the corner of your bottom lash line. Make sure the paper extends to your hairline & follow along it with your liner. I find that this technique works the best for people with mono-lids, deep set eyes, or hooded eye lids because it extends the line beyond the crease which can distort your wing. This technique also elongates the eyes.

Now that you have the bases of your outer line (which is definitively the hardest part) it's time to bring it towards your top lash line.
If you want a more dainty look, start about half way up your outer line. Pull it in a sweeping motion to a forth of the way into your top lash line, accenting a deep curve. Then blend the liner into your lash line. Keep building this line until you are happy with it. You can build it up higher on your outer line as well as further into your lash line. Remember to build slowly & alternating between both eyes, making sure they are even (nothing sucks worse then having one eye perfect & then trying to get the other to match).
If you want a stronger look, pull  your line over from just below the top point of your outer line. Drag it in a straight line towards your lash line. You can pull it to about a forth of the way in for a modern pin-up look, half way for a dramatic effect, or almost all the way to the edges of your lashes for a great rock chic look.
Of course, either of these techniques can look more subtle or stronger depending on how high you take the initial outer line.

Now for the liner against your top lash line. This comes down mainly to personal choice & how you want your eyes to look. The top liner greatly effects the way your eyes will look shaped.
For a sultry Marilyn Monroe type of shape, start at the inner corner of your lashes (just at the very start of your tear duct). Make a straight angled line to about a forth of the way into your lash line, it should be about a 45 degree incline. Now round out the corner into a straight line across your lash line to your outer corner. Make sure to round out the edge before your wing as well.
For a dramatic, rocker type of look start at either the edge of your tear duct or just a little bit into your lash line. Now do a straight angled line to your outer wing. The higher you take this, the more dramatic it will look. I suggest starting by taking it just a little bit less the 1/4th of the way up & then building it from there. This will give your eye a very lifted elongated shape. I think that this works best when your initial outer line is more angled away from the crease (techniques # 3, 4, & 5)
For a rounded baby doll look, do a line tightly against your lash line. Now, slowly build up a dome in the center of your lid pulling it down towards the corners. You may have to even out the angle or sweep between the outer edge of your dome & your wing depending on how steep or wide it is. Work with it until it flows the way you want it to, this may take a little time & practice so be patient.

I know that this was a rather long blog post with a ton of information. I tried to explain things as clearly as I could but, if you have any questions at all or would like a short video on a specific technique please feel free to comment below.
Hope this helps you figure out a few new tricks to winged liner!